Add OMRON PLC via Ethernet Port
OMRON PLC data can be collected through WAN, LAN and cascaded switch.
LAN Port Configuration
1.Below is example of adding OMRON PLC CP1L-EL to LAN port. Configure it as below.
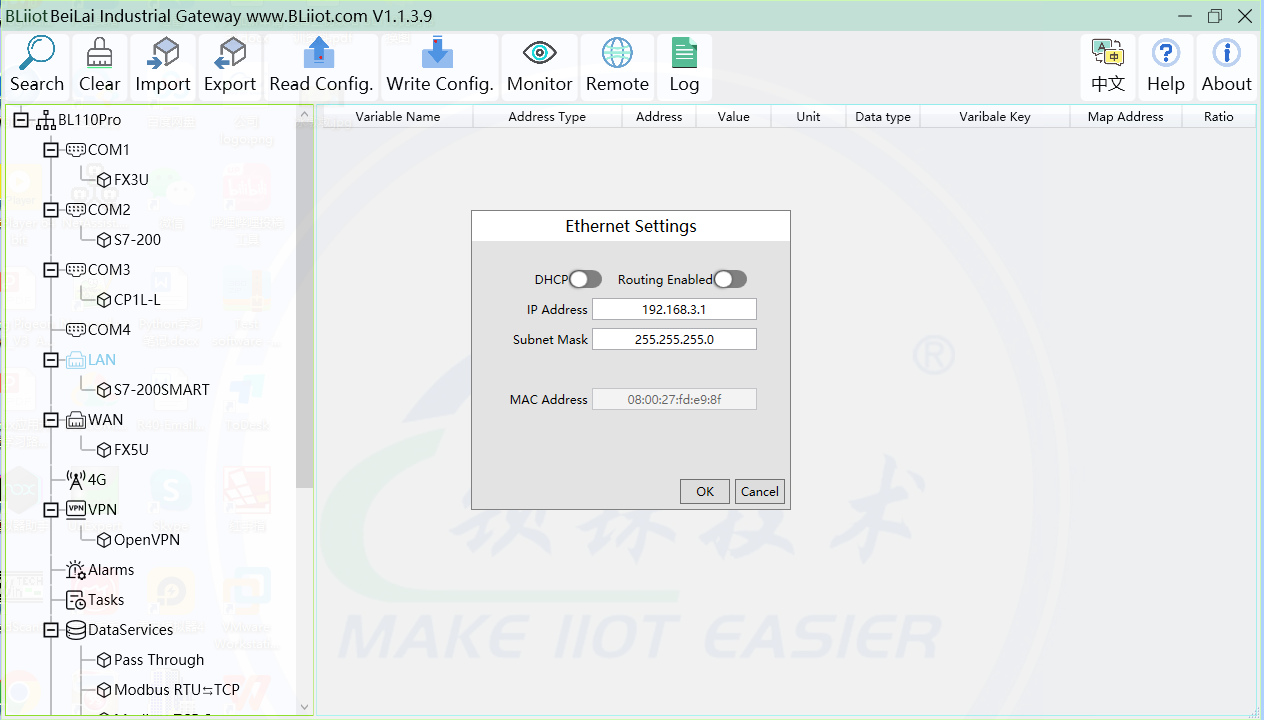
2.Double click LAN to enter configuration box
3.DHCP: Enable auto IP distribution. Default is disabled.
4.Routing: Enable network routing function. Default is disabled. For example, PLC CP1L-EL does not need network. Thus it’s necessary to enable it.
5.IP Address: Defaut is 192.168.3.1, the IP addresses assigned to LAN port devices must be within the range. WAN and LAN IP address can’t be the same. For example, CP1L-EL IP is fixed, then change IP address of gateway.
6.Subnet mask: Subnet mask of the LAN port gateway.
7.MAC Addres: Input LAN port MAC address
8.Click OK to confirm it
Note: Click Write Configuration and Gateway will restart. Turn off the power of Gateway and restart it. After that LAN port configuration is done successfully
Note: LAN Port IP Address specifies the IP address arrange of LAN port device. If device IP address is not within the range, data can’t be collected. Thus it’s necessary to change LAN port IP address according to requirement. IP Address change will not be effective until gateway is powered off and powered on again.
Add OMRON PLC CP1L-EL to LAN Port

1.Click LAN and right click mouse and click Add to enter device configuration box.
2.Device Name: set device name, for example, set CP1L-EL as device name.
3.Device IP: input PLC IP address. For example, PLC CP1L-EL IP is 192.168.3.151, thus put 192.168.3.151 here. This is PLC IP address. PLC IP address and LAN Port IP address must be in the same range.
4.Device Port: Fill in LAN port device port. CP1L-EL default port is 9600.
5.Device Brand: Select Omron as Device Brand and select FINS_TCP as device model The polling interval and timeout are set according to requirements.
6.Click OK to confirm adding PLC CP1L-EL.
Note: CP1L-EL device icon will appear after confirming the configuration. If more devices to be added, perform the same procedure as Step 1-6.
Note: Click Write Configuration and gateway will restart automatically. After restarting, PLC CP1L-EL is added successfully
Add LAN Port OMRON PLC CP1L-EL Datapoint
Below example is part of PLC CP1L-EL register CIO & D data configuration.

1.Click CP1L-EL, move mouse cursor to the right box, right click the mouse and click Add to enter datapoint configuration box.
2.Variable Name: Set the name of datapoint, for example, D100.
3.Variable key, which can be filled in arbitrarily. The identifier cannot be repeated.For example: D100.
4.Select the collection address data format filled in the input gateway according to the requirements. OCT/DEC/HEX are. octal/decimal/hexadecimal respectively. CP1L-EL D register is decimal, so choose decimal.
5.Address Type: select address type according to PLC register. Here D100 address type is D.
6.Address: Register address of datapoint. Here D100 address is 100.
7.Data Type: select data type according to PLC register type.
8.Add Number: If addresses are consecutive, the same register will collect multiple addresses.
9.Read/Write: Select from Read only and Read & Write.
10.Ratio: Set the ratio to be multiplied or minified for uploading to cloud
11.Map Address: Set address where datapoint will be saved in BL110.
12.Modbus mapping address can be any from 0 to 2000 and it can’t be repeated.
13.For example, set 9 as D100 mapping address.
14.Variable unit: Fill in according to requirements, or not fill in.
15.Click OK to confirm.
Note: After confirming the configuration, datapoints will appear in the box like above picture. To add more datapoints, right click the box and click Add to enter configuration box. Perform the same procedure as Step 1-13.
Note: Click Write Configuration. Gateway will restart automatically and CP1L-EL datapoint is added successfully.